This low cost fire pit landscape design guide shows homeowners how to plan a welcoming fire pit with lower-cost materials—not lower safety standards. A successful design begins with the location, available space, fuel type, and the size of the surrounding seating area.
A backyard fire pit can extend outdoor evenings, create a gathering point, and connect a patio with the yard. These ideas cover several practical options, including a wood-burning fire pit, gas fire pit, portable bowl, and permanently installed pit. Each option has different clearance, ventilation, maintenance, and local-rule requirements.
The guide compares accessible materials such as gravel, pavers, natural stone, concrete blocks, sand, and approved metal inserts. Ordinary masonry is not automatically safe for direct flame or repeated heat, so choose a listed vessel or compatible insert before building the surrounding feature.
With careful placement, basic tools, and verified local requirements, a DIY fire pit can complement many landscape styles without the cost of a large professional installation. Plan the complete fire pit area first, then choose materials, seating, and a construction method that suit your home, yard, and budget.
Key Takeaways
- Measure the gathering area and circulation space before buying materials.
- Compare gravel, pavers, stone, blocks, sand, and approved inserts.
- Choose a fire pit design that fits the patio, backyard, and yard.
- Check local rules, manufacturer instructions, and safe clearance requirements.
- Arrange seating beyond the heat zone so the fire pit remains useful and accessible.
At a Glance
A safe fire pit starts with an approved location, a level noncombustible base, compatible materials, and seating beyond the heat zone. A 10-foot separation from structures is common DIY guidance, not a universal legal requirement. Verify the current rule for your area before construction, because setbacks may vary by fuel, pit type, zoning, and local code. A beginner paver ring often costs $75–$250 and takes half a day to one day, depending on the ground and preparation work.
Affordable options include gravel, pavers, natural stone, concrete blocks paired with an approved insert, and listed tabletop units. Choose materials and products rated for high heat instead of assuming ordinary masonry can safely contain a fire. The fire pit area should also include a stable surface, clear access, and enough room around the fire pit for safe movement.
Four to six chairs can create a comfortable conversation area for a smaller backyard fire. Place each seat beyond the heat zone and leave enough space for people to walk behind it. Larger fire pits need wider circulation, so measure the complete pit area—not just the vessel—before buying materials. Keep a clear route between the yard, patio, home, and seating.
- Check the surface for level, stability, drainage, and standing water.
- Keep cushions, branches, structures, brush, and stored wood well away from the fire.
- Compare material prices, tools, delivery fees, permits, and installation time.
- Use an approved insert with concrete blocks and follow its clearance instructions.
- Confirm local requirements before construction or operation.
Choose the Right Fire Pit Location
Good placement protects your home, improves comfort, and makes the backyard easier to use. Begin with an open, level place at least 10 feet from buildings, fences, sheds, and other structures as general guidance. This distance is not a substitute for local code, a permit condition, an HOA rule, or the manufacturer’s instructions.
Clearance From Structures and Overhead Branches
Inspect the full space above and around the fire pit. Do not place it beneath tree branches, pergolas, umbrellas, roof eaves, or other combustible features. Keep chairs and foot traffic outside the hottest area, and choose a visible route between the yard and patio. Local rules may require more clearance than this basic recommendation.
Drainage, Utilities, and Ground Conditions
Call 811 before any excavation, then arrange separate locating for private utility lines that public marking may not cover. Standing water, expansive clay, loose fill, and steep slopes can shift the base or send runoff toward the patio. A firm, well-drained ground surface supports a safer pit and a more stable landscape design.
Georgia and Cherokee County verification: Before building or using a fire pit in Cherokee County, Georgia, check current requirements with Cherokee County Fire and Emergency Services, the applicable city or town, the Georgia Forestry Commission, and the local permitting or fire-code office. Confirm burn rules, permits, burn bans, fuel restrictions, operating conditions, and required setbacks from structures or property lines. County requirements may differ inside incorporated city limits and may change according to fuel type, pit construction, zoning, weather conditions, or HOA rules. Do not rely on an unverified online distance; obtain written confirmation from the authority having jurisdiction.
- Confirm setbacks, Georgia burn rules, permits, and current restrictions with local officials.
- Follow product instructions for inserts, gas systems, wood-burning units, and portable fire pits.
- Keep the site clear of brush, dry landscaping, stored wood, clutter, and overhead hazards.
Set a Realistic DIY Fire Pit Budget
Set a spending limit before choosing a fire pit, materials, or landscaping features. A realistic budget should cover the vessel, the heat-safe surround, seating, fuel, drainage, and the surrounding area. Planning the complete fire pit space first helps prevent a low-cost project from becoming an unexpectedly expensive patio improvement.
Low-Cost Materials and Basic Tools
A simple DIY fire pit project may need pavers or bricks for a cosmetic surround, spray paint, a shovel, tamper, gravel, sand, mallet, and compatible construction adhesive. Add a concrete-blade saw only when cuts are necessary. Keep money aside for a listed insert or fire-rated bowl, spark control, lighting, and an approved extinguisher. Ordinary bricks, pavers, concrete blocks, and decorative stone should not be treated as a certified firebox unless the manufacturer approves them for direct flame and repeated heat.
The lowest-cost safe build is often a listed backyard fire pit bowl or ring placed on a properly compacted gravel base. The vessel contains the fire; the gravel creates a defined, draining surface around it. A cosmetic wall can improve the look, but it does not replace the rated firebox, burner pan, or insert. For a gas fire pit, include the cost of listed components, shutoff access, ventilation, and qualified gas work.
Costs That Can Change the Final Price
Material prices vary by region and supplier. Delivery, permits, utility work, site preparation, drainage, seating, landscaping, fuel, and hired labor can raise the final bill. Price the fire pit vessel and its heat-safe surface separately from the surround. A modest pit may still require a broad patio base, retaining work, or additional space for safe circulation near the home.
| OptionEstimated RangeTypical Time | ||
| Paver ring | $75–$250 | Half a day to one day |
| Block surround with insert | $80–$275 | One day |
| Tabletop bowl | $50–$225 | One to two hours |
| Concrete-look surround | $175–$600 or more | Two to three days, including curing |
Low Cost Fire Pit Landscape Design Principles
Start with the conversation circle, not the fire pit itself. A successful low cost fire pit landscape design accounts for chairs, walking paths, side tables, and the available space before selecting the feature. Place the heat source inside that circle, with clear access around the fire pit and a direct route to the yard, patio, and home.
Define the Fire Pit Area
Choose one firm ground material, such as gravel or pavers, and finish the fire pit area with a clean edge. Repeating the same texture through the landscape makes the design feel intentional rather than improvised. Low-cost landscaping can combine a compact surface with simple planting, an outdoor rug, or movable chairs to create an inviting outdoor room without adding unnecessary construction.
Connect the Pit Area to the Backyard
A wide path can link the seating zone with the home, patio, pool, dining area, or outdoor kitchen. Use lawn-set pavers, compact gravel, or a small step where grades change. In a larger yard, arrange kitchen, dining, and gathering spaces so guests can move without crossing the warm zone. Repeat plants, stone, or a border material to guide the eye and connect the pit area with the rest of the landscape.
Keep every route open and leave enough space behind the chairs for people to pass safely. These practical ideas improve the look of the yard while keeping circulation, maintenance, and heat management in the design.
Classic Paver Fire Pit With Gravel
A round paver ring creates a clear focal point for a patio and works well with four to six chairs. A backyard fire pit with a 36- to 44-inch opening can provide useful warmth without overwhelming the area; confirm whether the measurement refers to the inside diameter of the selected insert or vessel. Its circular form supports relaxed seating, while a rectangular fire pit can match a linear patio, sofa, or retaining wall.
Best Materials for a Beginner Build
Follow the material-selection rule: choose the listed vessel or approved insert first, then select the surrounding concrete or stone pavers. Pavers may tolerate heat better than some clay brick, but standard landscape units are not automatically suitable for direct flame or repeated heat cycles. Use an approved metal ring or listed high-heat insert whenever the manufacturer requires one, and keep ordinary masonry outside the firebox.
Use compacted gravel beneath the ring for drainage and a stable surface. Keep wood outside the opening until use, and confirm that every product is rated for this application. Adhesive should remain outside heat-exposed zones and be used only when compatible with the selected design.
How to Create a Stable Paver Ring
- Mark a 36- to 44-inch circle based on the vessel or insert dimensions, then remove loose soil.
- Fill the base with gravel, compact it thoroughly, and check that it is level.
- Dry-fit the first course with trapezoidal blocks, leaving the required clearance around the insert.
- Stagger each row, check the level, and apply compatible adhesive only where the manufacturer permits it.
A rectangular fire option can suit a modern landscape, while a round form supports conversation and flexible seating around the fire. Confirm the opening, base depth, drainage, and heat rating before construction.
| MaterialBest UseKey Check | ||
| Concrete paver | Outer wall | Use an insert |
| Stone paver | Natural look | Check heat rating |
| Gravel | Level base | Compact firmly |
Affordable Gravel Fire Ring Ideas
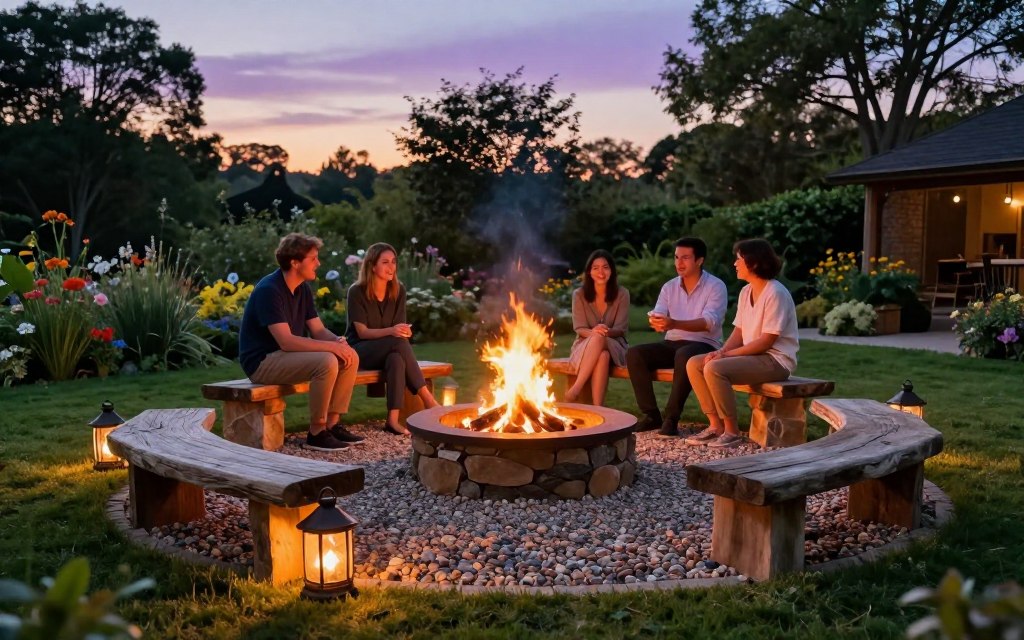
Gravel creates a neat, affordable surface without covering the entire patio with pavers. Begin with a compacted gravel or decomposed-granite base around a listed fire pit, not inside the firebox unless the manufacturer approves that material for repeated heat. Leave enough room for chairs, walking paths, and safe access around the backyard fire pit.
A black steel bowl over gray gravel creates a crisp contrast, while tan decomposed granite gives the landscape a warmer look. River rock can add a relaxed backyard style, but loose decorative stone may shift, retain moisture, or become a trip hazard. Keep the vessel on a firm, level base and choose only media specifically approved for the fire pit.
- Use one gravel tone to connect separate seating areas across the yard.
- Add a narrow masonry edge to keep loose gravel from spreading into paths.
- Repeat the same aggregate in a walkway or planting bed for visual unity.
- Keep chairs on a firm, level surface with clear space behind them.
- Use decorative stone inside the firebox only when the manufacturer approves it for repeated heat.
For practical fire pit ideas, match the ring, seating area, and nearby walkway with a restrained material palette. This simple landscaping approach gives the space a finished look while keeping installation manageable. Check drainage after rain, compact or replace settled gravel, and maintain a clear route between the fire and the home.
Budget Cinder Block Fire Pit With a Fire-Safe Insert
A cinder-block surround can create a sturdy outdoor feature for about $80–$275. Treat the blocks as an exterior shell, not as the direct firebox. Ordinary concrete blocks may crack or spall when exposed to intense heat, so the selected fire pit must use a compatible insert or listed fire-rated vessel.
Why Standard Blocks Need Protection
Choose the insert before sizing the surround. Follow its opening, clearance, drainage, ventilation, and support requirements. Then dry-stack the blocks on a level, noncombustible base. Check every course before securing the surround, and keep adhesive outside heat-exposed areas unless the product instructions specifically permit its use there.
Choosing a Compatible Insert
For a gas fire pit, use a listed burner with its matching pan, cover, ignition system, and connection. Never improvise gas components or convert a wood-burning fire pit without approval. Gas fuel requires proper ventilation, protected lines, safe shutoff access, permits where required, and qualified installation when the work exceeds approved homeowner instructions.
- Confirm the insert rating and required clearances before building.
- Keep vents open and protect fuel lines from damage.
- Review permits and local rules before connecting gas components.
- Use DIY backyard gathering ideas for seating inspiration.
A wood-burning model needs different parts, clearances, and burn-rule checks. Compare budget outdoor planning tips before setting the unit beside a patio or near the home.
Simple In-Ground Fire Pit Design
An in-ground backyard fire pit blends into an open yard and keeps visual clutter to a minimum. This low-profile landscape feature suits homeowners who want a quiet focal point instead of a raised structure. Typical materials and labor range from $100 to $350, but the final cost depends on excavation, drainage, materials, permits, and site conditions. The project requires intermediate DIY skills.
Excavation requires careful planning. Call 811, assess the soil, and create a stable, noncombustible base before adding stone or masonry. Plan drainage first so rainwater does not collect below the fire pit or burner area. Keep a clear egress route between the seating zone and the home. A noncombustible surface does not make an otherwise noncompliant location legal, so verify setbacks and local rules before digging.
A shallow rim may look neat, but it can become a trip hazard for children, pets, and guests after dark. Use contrasting edging, low-glare lights, and an open path around the feature. A wood-burning model also creates smoke, sparks, and ash, so check wind patterns, burn restrictions, and nearby properties before choosing this design.
| FactorKey BenefitMain Concern | ||
| In-ground form | Recedes into the yard | Harder to see at night |
| Excavation | Creates a stable base | Needs utility checks |
| Wood fuel | Classic outdoor warmth | Smoke and sparks |
Portable and Tabletop Fire Pit Options
Portable units suit renters, compact patios, and homes that need flexible outdoor warmth. A listed tabletop fire bowl often costs $50–$225 and takes one to two hours to set up. Solo Stove offers a popular portable fire pit option for a compact backyard, but verify the current model instructions, clearances, and price before purchasing.
Flexible Setups for Small Backyards
Keep the DIY work focused on the tray, vessel styling, and seating. Never alter an approved burner, fuel line, or gas system. A level landing surface should fit the unit, required clearances, two to four chairs, and a visible route across the patio. The manufacturer’s instructions control portable fire pits, even when a local surface appears suitable.
Compare a round bowl with a rectangular fire pit table. The table can provide useful room for drinks or books when the flame is off. Review outdoor living spaces for ways to connect this feature with nearby areas.
Heat-Safe Surfaces and Storage
- Place the vessel on a heat-compatible, stable surface.
- Move portable fire pits only after they cool completely.
- Store fuel and covers according to manufacturer instructions.
- Keep children, pets, fabric, and dry debris away during use.
Plan the Ground Surface Around the Fire Pit
The ground beneath this feature affects safety, comfort, drainage, and long-term upkeep. Choose a firm, noncombustible base that links the yard to the patio without creating a trip hazard. Match the surface to the site: gravel can suit wet areas when properly compacted, pavers work well for defined paths, and concrete may offer a low-maintenance look when designed for drainage and thermal movement.
Compare Surface Materials
| MaterialInstallationAppearance and CareDrainage | |||
| Gravel or shells | Easy; compact a prepared base | Casual; refresh when it spreads | Excellent |
| Pavers or slate | Moderate; set over compacted base | Neat; sweep joints regularly | Good with open joints |
| Flagstone or stone | Moderate to high; level each piece | Natural; inspect for movement | Good with proper grading |
| Concrete | High; requires careful planning | Consistent gray palette; seal as needed | Depends on slope and joints |
Brick, flagstone, slate pavers, gravel, and shells can suit different outdoor settings, but check each product near the selected fire pit. Some pavers may tolerate heat better than some clay brick, yet no material should be assumed safe for direct flame without manufacturer approval. Concrete may crack or spall when moisture and thermal shock combine, so separate the flame vessel from the slab and provide drainage.
Create a Defined Landing Zone
- Extend the noncombustible area beyond the vessel and chairs.
- Keep sparks away from lawn, mulch, and dry groundcover.
- Compact gravel or install pavers over a stable base.
- Repeat one material to connect the area with the patio.
A clear edge gives the outdoor room a finished design. See this backyard planning guide for added inspiration.
Arrange Seating Around the Fire Pit
Good seating turns an outdoor flame into a useful gathering place. Allow about seven feet around the fire pit for chairs, serving tables, entry, and easy movement, but treat this as planning guidance rather than a universal clearance rule. The manufacturer’s instructions and local requirements control the final distance around the fire, especially for gas or high-output units.
Choose a layout that matches your backyard, patio, pit size, heat output, and available space. A conversation circle fits four to six chairs. A compact square works well for four seats and leaves a clear path on one side. A sofa lane suits five to eight people along a straight edge. Measure the furniture itself, including arms and table depth, before finalizing the seating area.
- Leave one open entry in the circle. Guests should not cross the heat zone or squeeze between chairs.
- Keep the main walkway behind or beside the seating area, with a clear route to the home.
- Place side tables outside the warm zone for drinks and serving items.
- Use a 30-gallon unit for eight to ten standard chairs or four to six Adirondack chairs only when the manufacturer supports that arrangement.
- A 50-gallon model can support 10–16 standard chairs or six to ten Adirondack chairs, depending on heat, clearances, and circulation.
| LayoutSuggested CapacityBest Use | ||
| Conversation circle | Four to six chairs | Small groups |
| Compact square | Four seats | Small patios |
| Sofa lane | Five to eight seats | Long, narrow areas |
Build a DIY Block Fire Pit Step by Step
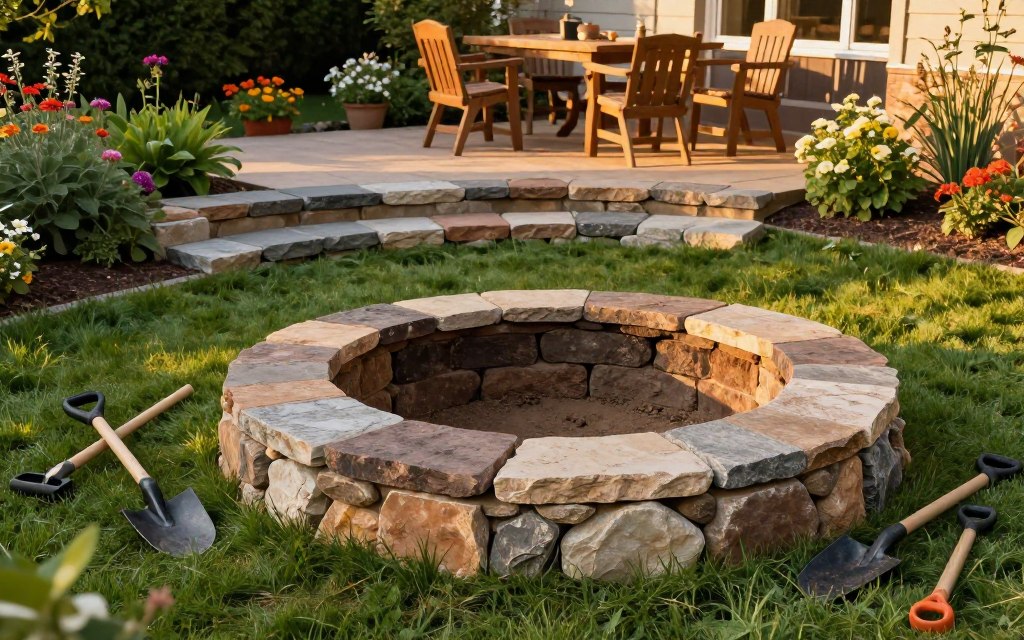
This beginner DIY method creates a backyard gathering feature with simple tools and careful measurements. Before excavation, confirm permits, property setbacks, utility locating, drainage, the approved fire pit or insert, and the manufacturer’s required clearances. A block surround is not a direct-fire box unless the selected system specifically rates it for that use.
Mark and Excavate the Footprint
- Dry-fit the first course of pavers around the approved vessel or insert on the ground.
- Mark the outside edge with spray paint, then remove the blocks.
- Excavate 6–8 inches across the marked area only after confirming utilities and local requirements.
- Check the base for firm soil, proper drainage, and a level surface.
Install the Gravel and Sand Base
Compact the soil with a tamper. Add a 2–3-inch layer of gravel for drainage, using the depth specified for the site and product. Cover it with sand, then tamp again until the surface feels firm and level. Keep the base noncombustible and sized for the vessel, surround, and safe access.
Stack, Level, and Secure the Walls
Place the first row and check each block with a level. Add sand under low sections or tap high spots with a mallet. Stack three or four rows with staggered joints only if the selected design permits it. Apply compatible construction adhesive between courses, keeping it outside heat-exposed zones. Keep ventilation openings clear, and use a concrete-blade saw only for careful cuts. Allow adhesive to cure before adding seating or using the area near the home.
Compare Wood-Burning and Gas Fire Pits
Fuel choice shapes the mood, upkeep, cost, and daily use of an outdoor gathering area. Wood-burning fire pits create smoke, sparks, and ash but provide traditional campfire character. Gas fire pits start quickly, stop cleanly, and avoid wood-ash cleanup, although installation and component requirements can increase the price.
| FactorWood-BurningGas | ||
| Price and setup | Usually less upfront; more hands-on work | Finished tables cost more; connections need care |
| Smoke and ash | Smoke, sparks, and ash require cleanup | No wood ash; cleaner operation |
| Ignition and upkeep | Manual lighting; remove ash often | Controlled start; inspect burner parts |
| Best lifestyle fit | Campfire character and flexible seating | Quick use on a patio or near sofas |
A rectangular fire pit or table can align with sofas and a linear patio. A round bowl often suits loose backyard seating. Compare available space, cleanup tolerance, fuel prices, ventilation needs, and local burn rules before making your choice.
Use listed components, proper ventilation, and qualified gas-line work when connections exceed approved instructions. Gas features also need clear access to shutoff controls and routine inspection. Never improvise a burner, pan, ignition system, or fuel connection.
Add Affordable Landscaping and Backyard Style
Thoughtful planting can make a fire pit feel like part of the yard instead of a separate feature. Keep the palette simple, and match nearby stone, concrete, gravel, or patio colors. This design approach adds character without creating a demanding maintenance plan.
Low-Maintenance Planting Around the Hearth
Yardzen landscapes often use Pacific Wax Myrtle, Japanese maples, boxwoods, mondo grass, succulents, drought-tolerant grasses, and native plants. Select varieties suited to local sun, soil, and water conditions. Keep mulch, dry leaves, branches, and water-hungry foliage beyond the noncombustible landing zone, and confirm that plants will not grow into required clearances.
Lighting, Privacy, and Shade Features
Use soft path lights to guide guests toward the fire pit area without creating glare. Hang string lights from approved structures, never directly above open flames. A fence, hedge, trellis, or layered planting can add privacy, but do not use combustible features where they violate the required clearance. In one Miami example, transparent glass safety fencing separated children from the pool while preserving an open view.
- Add a pergola, shade sail, curtain, or mature tree canopy for daytime comfort only when the placement complies with local and manufacturer requirements.
- Arrange chairs and seating within a welcoming outdoor room while keeping access routes open.
- Choose plants that support the overall design without blocking safe access or creating dry fuel near the flame.
Fire Pit Safety Requirements for Homeowners
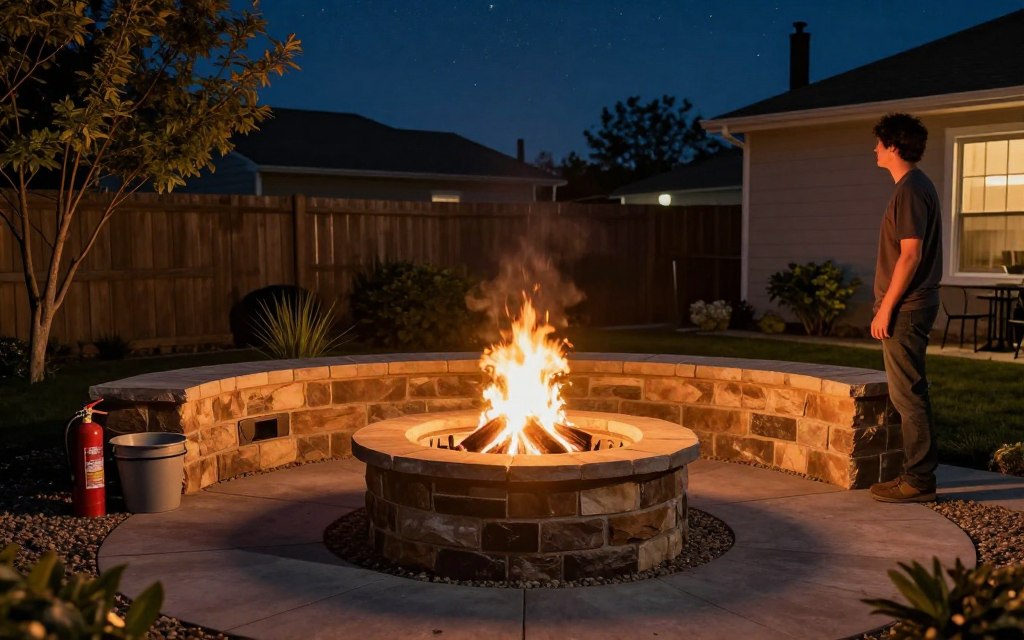
Safe use starts with rules, distance, active supervision, and a suitable surface. Basic guidance places a fire pit at least 10 feet from a home, fence, shed, or other structure, but this is not the final legal answer. Local codes, permits, burn restrictions, product instructions, and professional advice control the requirements.
Clearances, Local Rules, and Burn Restrictions
Before building or operating one, contact your city, Cherokee County officials, local fire officials, and HOA. In Georgia, confirm current open-burning definitions, recreational-fire rules, burn bans, permits, prohibited materials, seasonal limits, and operating conditions with the appropriate authority. If the property is in Cherokee County, verify the current setback requirement with Cherokee County Fire and Emergency Services and the applicable incorporated city or town. County rules may not apply inside city limits, and the required distance may vary by fuel type, construction, zoning, property lines, combustible materials, and burn-ban status. Do not publish or rely on an exact setback number until the responsible authority confirms it.
Ask about open flames, permits, overhead conditions, operating hours, fuel type, and required clearances. Apply the stricter rule when local guidance and the manufacturer’s instructions differ. Verify the information immediately before construction and again before use because ordinances and burn restrictions can change.
Review the insert, burner, fuel system, and surrounding surface. For added guidance, see this professional installation resource.
Safe Operation, Extinguishing, and Ash Disposal
- Supervise children and pets, and keep a clear space around the flame.
- Keep an appropriate extinguisher or water source within reach.
- Never leave a gas fire pit, wood flame, or portable unit unattended.
- Extinguish wood fully and wait until all equipment feels cold.
- Follow local guidance for ash disposal; never place warm ash in household waste.
Common DIY Fire Pit Mistakes to Avoid
Small shortcuts can turn a backyard project into a safety problem. Review each step before lighting the first flame, then correct weak points early.
- Using untested materials: Ordinary pavers, river rock, concrete blocks, or reused metal may crack, spall, or fail under heat. Use an approved insert or fire-rated vessel.
- Skipping utility checks: Call 811 before digging 6–8 inches. Private gas, electrical, irrigation, and communication lines may not appear on public markings.
- Ignoring nearby hazards: Keep the pit away from the home, fence, branches, mulch, and dry landscaping. Sparks and radiant heat can reach combustible surfaces.
- Building on loose soil: Compact the base, add gravel, level the sand, stagger joints, and secure the wall. Never stack blocks on undisturbed ground.
- Creating a hidden edge: Separate seating from the flame. Mark a shallow in-ground rim with lighting or contrasting material to reduce trips.
These checks protect people while preserving a clean outdoor look. They also make future pit ideas easier to maintain.
Conclusion
Backyard fire planning balances design, safety, budget, seating, patio access, and a welcoming room in any yard. Before buying materials, verify the location, fuel type, setback, permit requirements, and current burn status with the authority having jurisdiction.
Who should build a DIY fire pit?
Homeowners who can excavate, level a base, verify heat-rated products, and check local rules may build a simple surround. Hire professionals for gas connections, retaining walls, drainage, structural work, or any task outside the product instructions.
What are the most affordable fire pit ideas for a backyard?
The most affordable method uses a listed ring on compacted gravel. A beginner paver ring often runs $75–$250 before delivery, permits, chairs, fuel, or nearby improvements. Confirm product ratings first.
How much space should surround a backyard fire pit?
Keep at least 10 feet from the home and structures as general guidance, then follow stricter local, county, city, HOA, or product rules. Allow about seven feet around the space for seating, walking routes, and circulation when the manufacturer permits it.
Why use an insert inside a backyard fire pit?
Ordinary concrete blocks may crack or spall under intense heat and repeated cycling. An approved insert or fire-rated box contains flame, shields masonry, and supports safer, more durable use over time.